

Wooden floors and water don’t mix. A slow leak, a flood from a washing machine or damp coming through a wall can stain, warp and lift timber boards surprisingly quickly. The good news is that you rarely need a whole new floor. Damaged areas can usually be cut out and replaced. But only once the water problem itself is fixed.
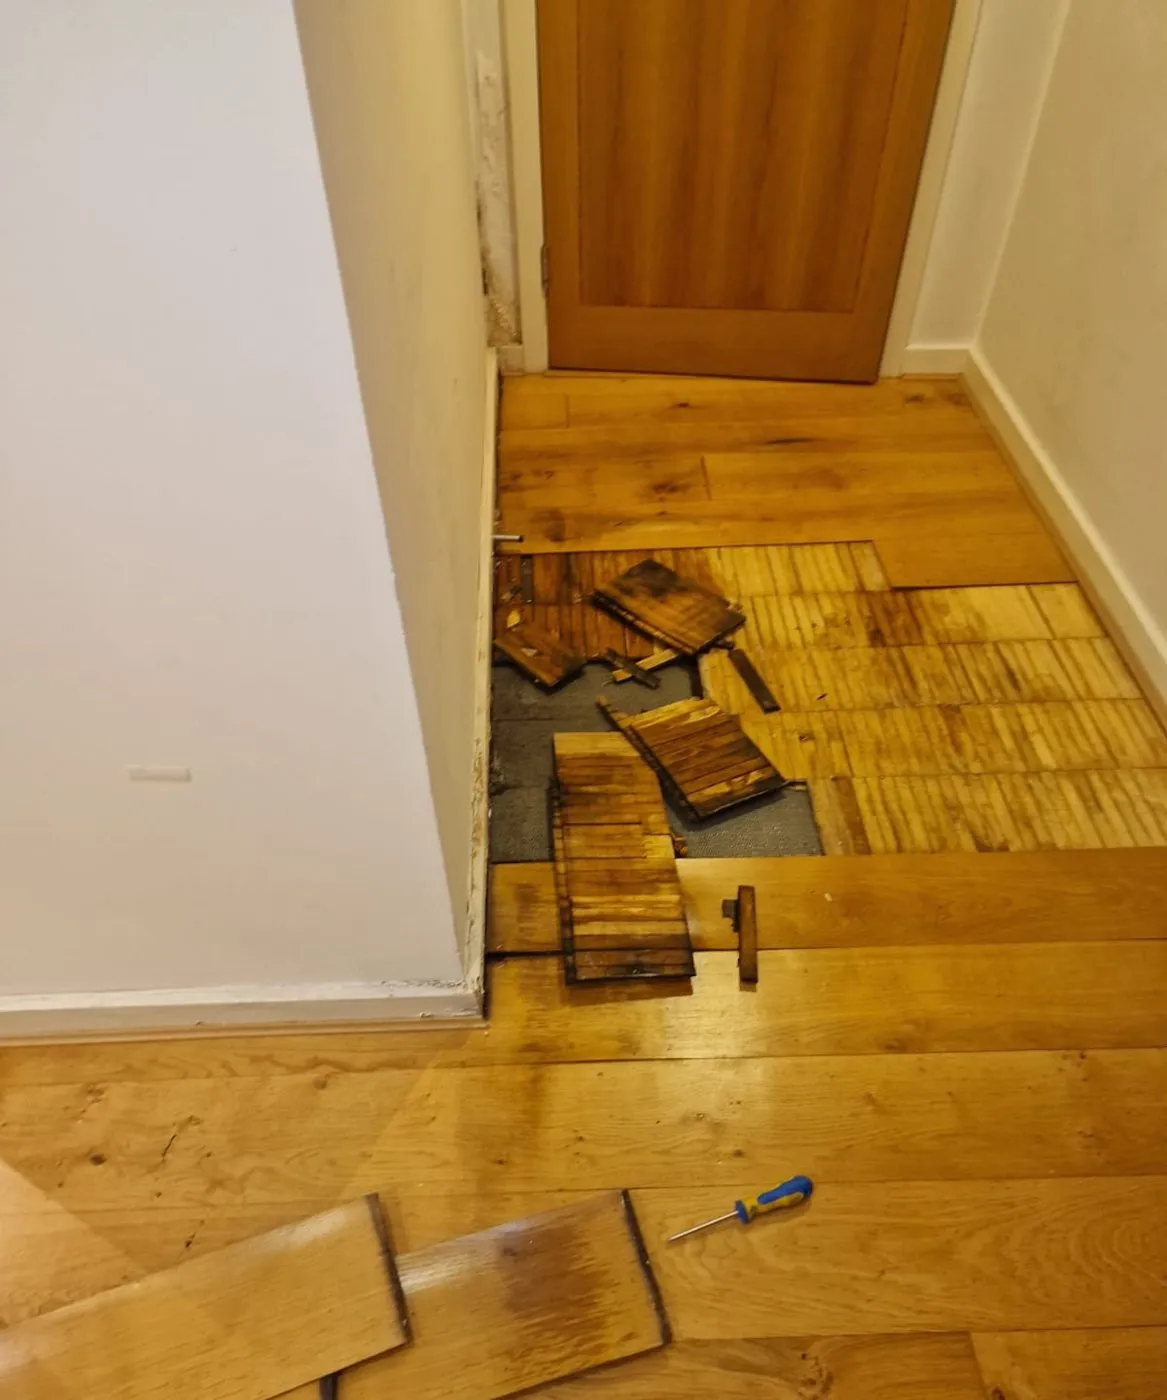
Signs of water damage on a wooden floor
- dark or black staining, especially along board edges and joints, as on the lifted boards in the photo above
- cupping, where board edges rise higher than the middle, or crowning, the reverse
- boards lifting, loosening or moving underfoot
- gaps opening up as boards dry and shrink after getting wet
- a musty smell, or mould on the skirting or nearby walls
On the job in the photo, the damage was caused by a leak, which was traced and fixed before the floor was repaired.
Step one: find the water
Replacing boards without stopping the water is money wasted. The damage comes back. Common causes include:
- plumbing leaks: radiator pipes and valves, kitchen and bathroom pipework, leaking appliances
- damp walls: penetrating or rising damp wicking into the floor at the edges of the room
- condensation under the floor, where ventilation is poor
- spills and floods that soaked through the joints
We use moisture readings across the floor and walls to map the wet area and trace it back to the source. Our damp and leak investigation guide explains how.
Step two: lift and dry out
Once the source is fixed:
- Lift the damaged boards carefully, working back to dry, sound boards so the repair can be blended in.
- Check what’s underneath. Older properties often have previous floors under the current one, like the old parquet in this photo, along with underlay, battens or a subfloor that may also be wet.
- Remove anything that’s rotten, mouldy or permanently stained.
- Let the subfloor dry fully, confirmed with moisture readings. Laying new timber onto a damp base is a recipe for the same problem again.
Step three: replace and blend in
- Match the boards as closely as possible in species, width, thickness and finish. Leftover boards from the original installation are ideal, so it’s worth keeping a few spare.
- Fit the new boards into the existing floor, matching the pattern and joints.
- Refinish with oil or lacquer to match the surrounding floor, so the repair doesn’t stand out.
- Refit or replace skirting that was damaged by the water.
Protecting wooden floors
- fix leaks quickly and check under sinks and around appliances regularly
- don’t wet-mop timber floors; use a barely damp mop and floor-specific cleaner
- use a water leak detector near washing machines and dishwashers in rooms with wood floors
- keep spare boards from any new installation for future repairs
Landlords and agents
Water-damaged floors often show up at end of tenancy or after a leak from the flat above. A documented repair, with the cause identified and before-and-after photos, makes insurance claims and deposit discussions much more straightforward. See our flooring service and property maintenance service.
We cover London and Essex, with our own engineers working every day across Chigwell, Loughton, Buckhurst Hill, Woodford, Ilford, Romford, Brentwood and Epping. Call 020 8227 0035 or request a quote.