

Tiles in a shower take more punishment than anywhere else in the home: water, steam, heat and daily cleaning. When grout or sealant fails, water gets behind them, and tiles start to loosen, crack or sound hollow. On this job we replaced a section of tiles inside a shower enclosure, without ripping out the whole bathroom.
Why shower tiles fail
- Failed grout or sealant lets water seep behind the tiles a little at a time
- Movement: shower trays and stud walls flex slightly, cracking rigid grout lines and tiles
- The wrong backing: standard plasterboard softens and breaks down when it gets wet
- Poor adhesive coverage: tiles stuck with “dabs” of adhesive leave hollow voids where water collects
Warning signs include tiles that move or sound hollow when tapped, cracked or crumbling grout, dark staining in the grout lines that won’t clean off, and damp or staining on the other side of the wall or the ceiling below.
Stripping back
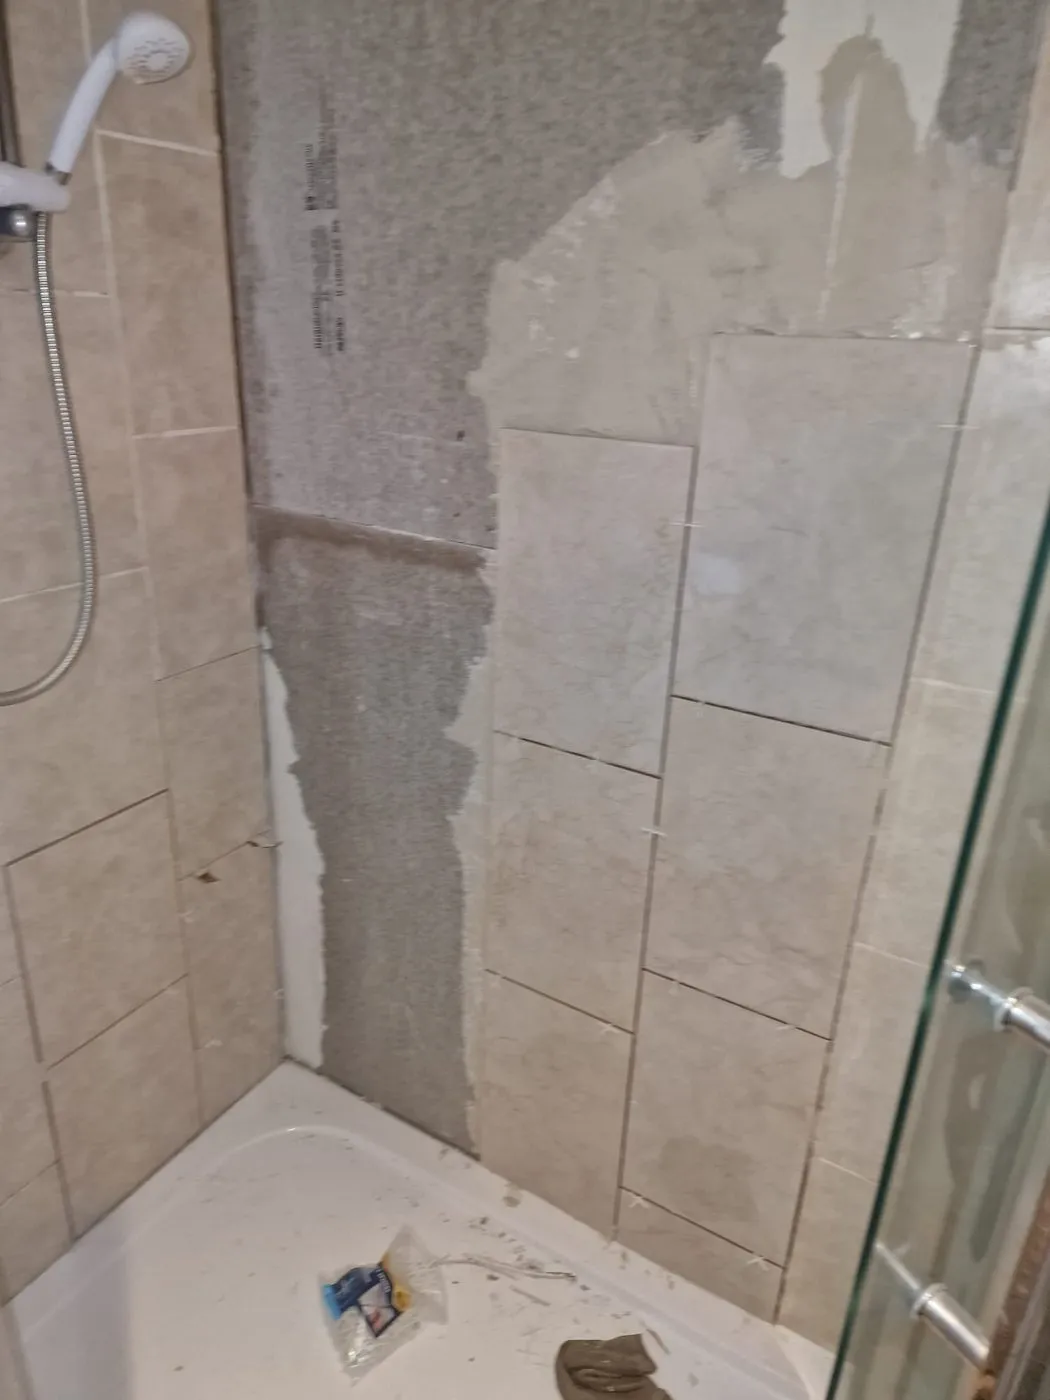
We carefully removed the affected tiles, taking care not to damage the shower tray, enclosure and the sound tiles on the neighbouring walls. With the tiles off, we could check the wall behind:
- is the backing board sound, firm, dry and undamaged, or does it need replacing?
- is there any sign of an ongoing leak from pipework, the shower valve or the tray?
- old adhesive was cleaned back to give a flat surface for the new tiles
On this job, the wall behind needed attention, so we replaced the backer board and tanked the wall before any new tiles went on.
Finding and fixing the cause matters. Retiling over a leak just means doing it again. See our guide to damp and leak investigation.
Retiling properly
Wet areas need the right materials and method:
- a water-resistant backing suitable for showers, such as cement-based tile backer board, with a tanking membrane where needed
- waterproof adhesive with full coverage behind each tile, not dabs, so there are no hollow voids for water to collect in
- tiles matched as closely as possible to the existing ones, set out to continue the original pattern
- spacers for even grout lines, as you can see in the photo
- waterproof, mould-resistant grout
- flexible silicone at internal corners and where the tiles meet the tray, because these joints move and rigid grout will crack
The result
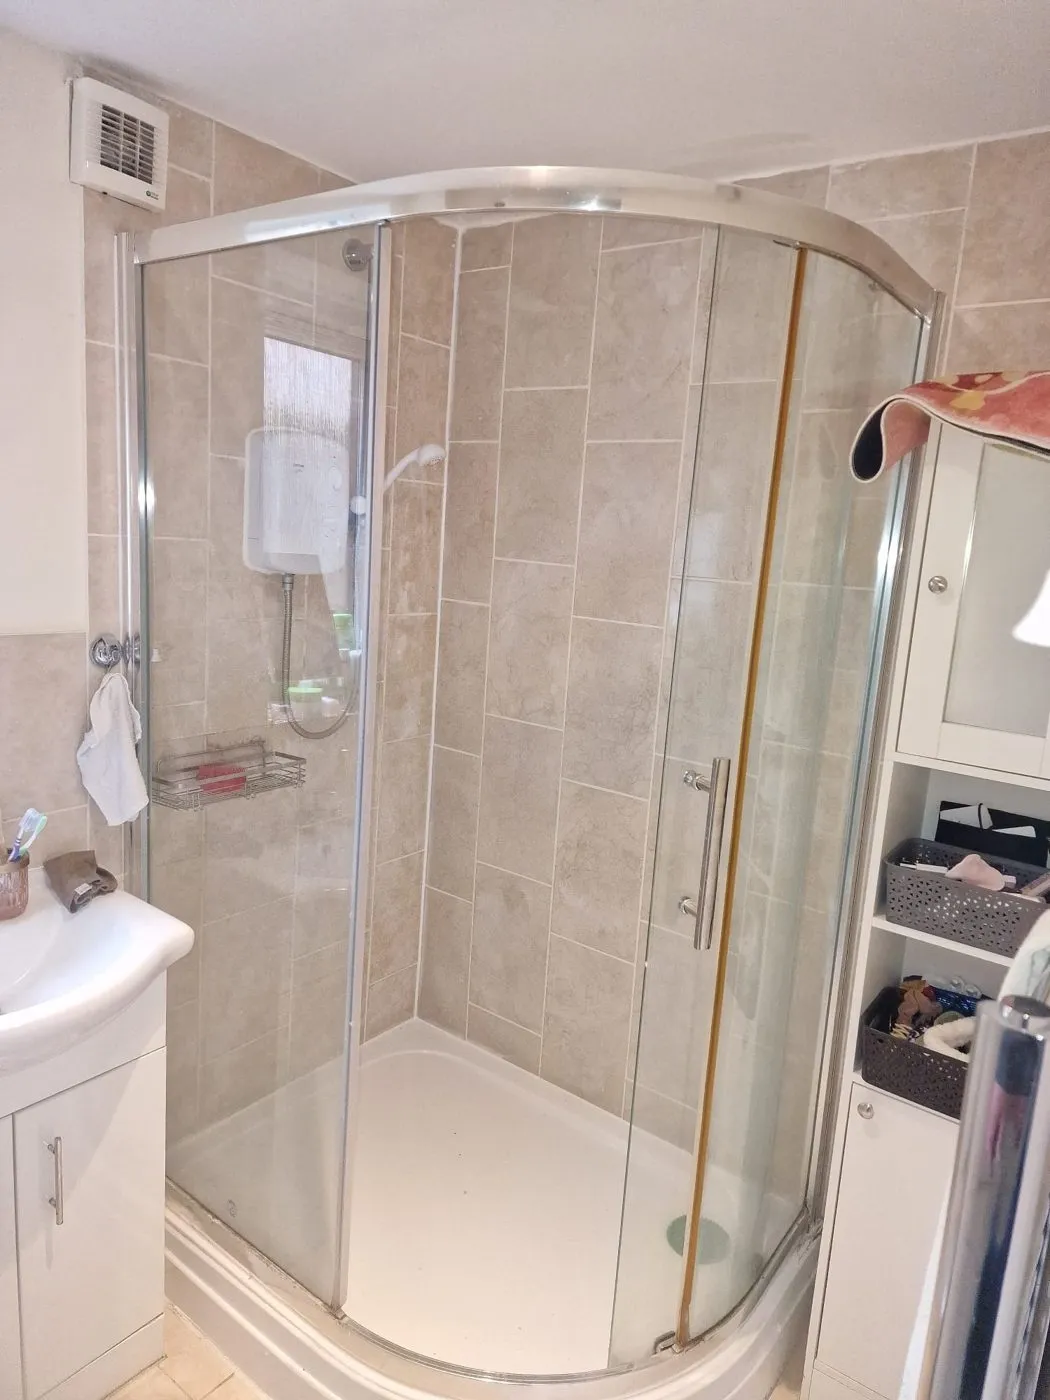
With the new tiles grouted and the joints sealed, the shower is watertight and the repair blends in with the rest of the bathroom. The client didn’t need a full bathroom refit, just a targeted repair done properly.
Keeping a tiled shower watertight
- reseal around the tray and in the corners when the silicone starts to discolour or lift. See our resealing guide
- regrout small areas as soon as cracks appear
- run the extractor fan during and after showers to reduce mould. See our extractor fan guide
- report loose tiles early, before water damages the wall behind
Landlords and agents
Loose shower tiles are a common issue at end of tenancy and on routine inspections. Fixing them early is far cheaper than dealing with a soaked wall or a ceiling coming down below. We send before-and-after photos with every repair. See our property maintenance service.
We cover London and Essex, with our own engineers working every day across Chigwell, Loughton, Buckhurst Hill, Woodford, Ilford, Romford, Brentwood and Epping. Call 020 8227 0035 or request a quote.